One of the new additions to Darkroom Booth 2 is Phidget control. Phidgets are “Products for USB Sensing and Control”. Huh? Phidgets is a company that makes little boards that can connect to your computer with a USB cable. On the other end of the board, you can plug in and control almost anything. The most common would be things you want to turn on or off or otherwise control. Said another way, Phidget devices give us a way to control things that you can’t plug directly into your computer, like a light or a fan. Anything that has an on/off switch or requires power can be controlled by a Phidget board or relay (Interface Kit). What does this mean for a Photobooth? Well, you can use a Phidget to turn LED lights on or off or blink. When someone starts a booth session, bright LED lights could turn on. When their photos are printing, lights or an arrow near the printer could flash. You could have a rotating light turn on when someone enters the booth and it could turn off when they are done. You could use a Phidget to control a fan, vending machine, or drink dispenser (like a Keg, my personal favorite idea). Your booth could be lit up with Green lights when no one is using the booth and Red lights when the booth is “in session”. A Phidget relay could also control a motorized pan/tilt device so you could actually move your Booth’s camera around. The possibilities are endless. How do Phidgets work in Darkroom Booth 2? Well, here’s where things get fun. In the past, you basically had to have computer programming skills in order to get Phidgets to work with your booth. Our competitors have “how to’s” that run into the 10’s of pages, just to get a single function to work. In Booth 2, you just point and click to setup and control your Phidgets. Here’s an example.
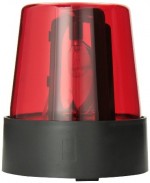 Let’s say when someone is using my Booth, I want this awesome Red Beacon Light to turn on (available from amazon for $11).
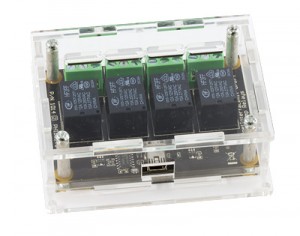
First, I need a basic Phidget Interface Kit. We have tested and many of our customers like the 1014 (available from phidget.com for $60. Click here for the Phidget user guide which will walk you through the setup and show you how to connect the board to a device).
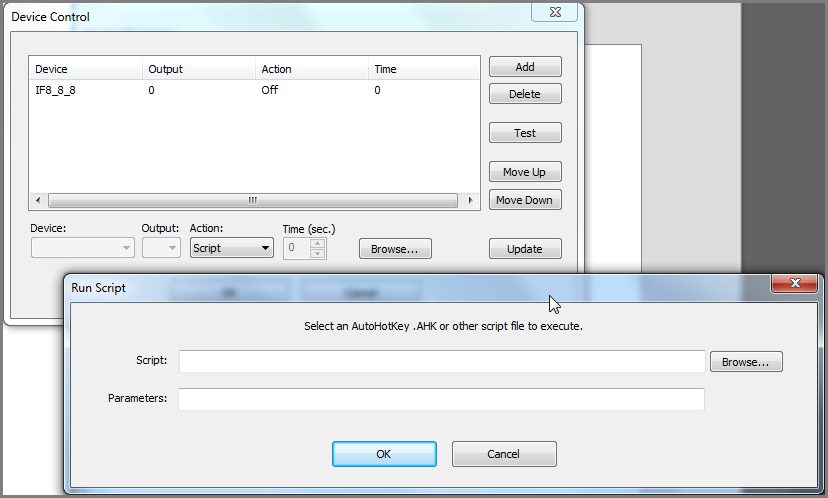
Next, I need to connect the 1014 to my computer via USB cable, then wire the beacon’s on/off switch to one of the 1014’s relays. Don’t worry, with Booth 2, that’s the hardest part. The easy part is setting it up in Booth. Booth installs the Phidget drivers for you, so nothing to worry about there. Plug in your Phidget board, go to Global Settings-> Device Control. On that page, you should see your Phidget Board at the top. On the bottom half of that window, you can tell the Board which relay you want to control at which part of the Booth session. For example, I’d set Relay 1 to turn ON when someone starts a session (Enter Boothmode) and set the relay to OFF when they are done (Exit Boothmode). Here’s what the screen looks like:
You can also see in the bottom we have built in options for blinking and toggling things on and off so you don’t have to know programming to do those basic things.
For those very astute readers out there, you’ll also see a new “hidden” feature we are including in Booth 2. Advanced users (we call them berds for booth-nerds) can tell Booth 2 to run a program or script (like Autohotkey) to do all sorts of unsupported things (like running other programs, playing videos, transferring files). Don’t show this to a beginner, but your Berd friends will love it, and no, you don’t need a Phidget device in order to tell Booth 2 to run scripts or external programs. Here is a screen shot of options:
Well, that’s it. We can’t wait to hear AND see just how you’ll use Phidget support in Booth 2!